


StampinUp 2018 Winter Sampler
StampinUp 2018 Winter Sampler
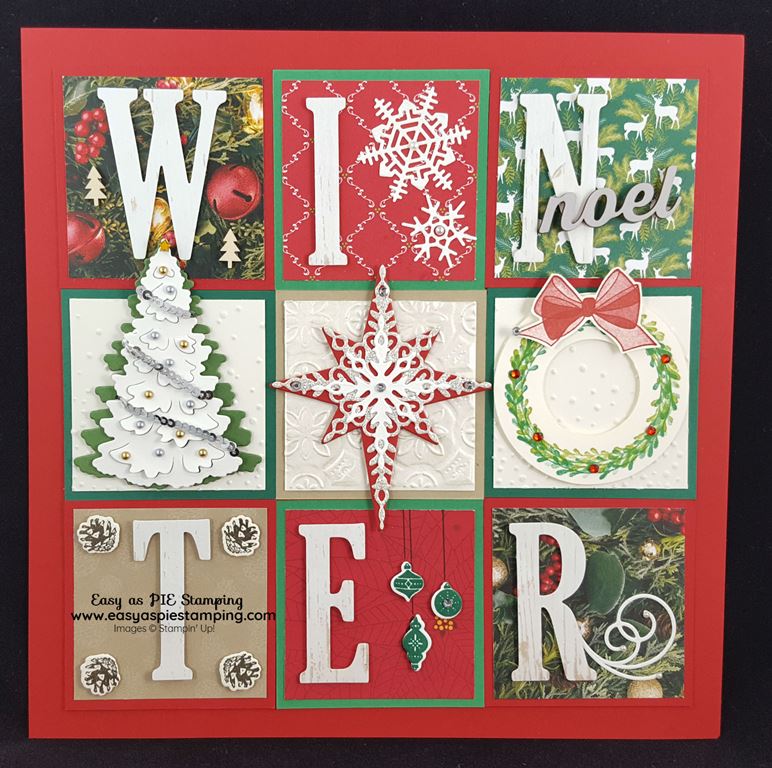
Winter Sampler Featuring 2018 Holiday Catalog
Hello Paper Crafters!! Today I wanted to share with you a Winter Sampler I made with products from the 2018 Holiday Catalog. There were a lot of really beautiful products in the catalog that I had ordered and wanted to use to make a sampler. The All Is Bright DSP is so gorgeous! I just knew I needed to use this. It has beautiful photo-realistic images along with traditional images like stockings, pinecones, ornaments, evergreens & poinsettias. I also pulled in two designs from the Under the Mistletoe DSP in the 2018-2019 Annual Catalog. My main focus when designing this sampler was to include Wishing You Well stamp set, Winter Woods Bundle and Starlight thinlits (Annual Catalog).
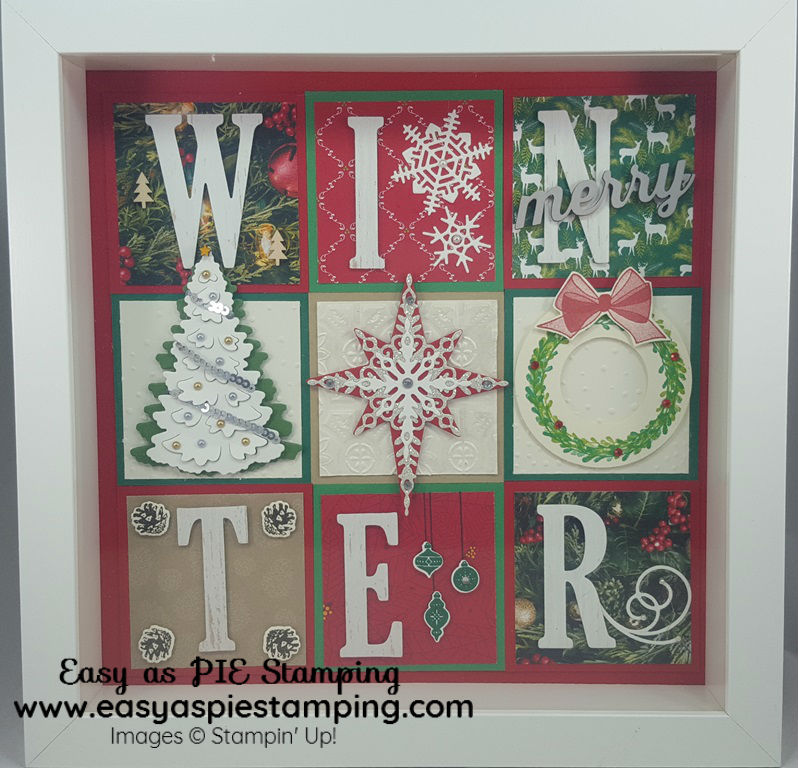
I spent a substantial amount of time designing this sampler so I decided to make 2 extras. I gave one as a birthday present to my sister and one as a housewarming gift to my brother and his wife.
StampinUp 2018 Winter Sampler
Designing a Sampler
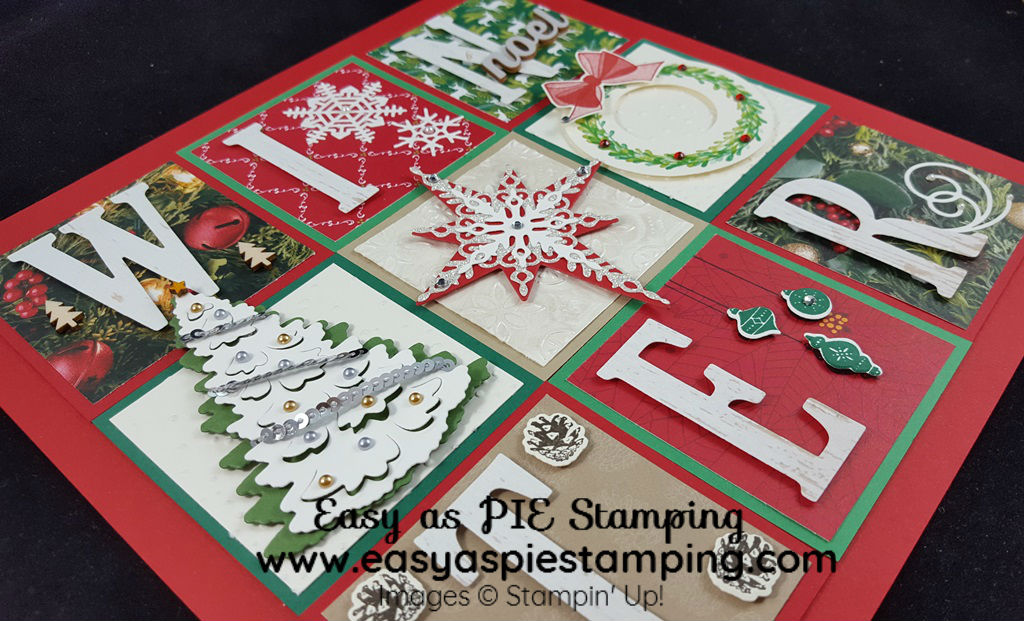
When I make a sampler I like to bring in a lot of elements. Even though the stamped, punched or die cut images for the center row extend out of their squares I liked how it looked. A sampler is your opportunity to include lots of embellishments. I used Festive Farmhouse Elements (the star on my tree, 2 pine trees with the “W”, “merry” with the “N”), metallic pearls, basic pearls and rhinestones, red rhinestones & silver mini sequin trim. It is also nice to add some texture. This was achieved by using embossing folders, glimmer paper & shimmer paint. A sampler is also a great way to show off our designer series papers. I’ll cut pieces and play around with them until I get a layout I am pleased with. So get out your stash and play around with it and make your own StampinUp 2018 Winter Sampler!!
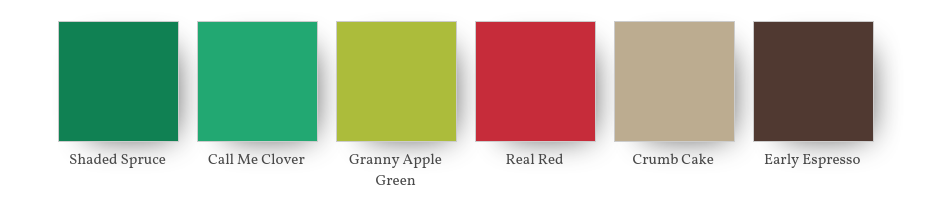
The Color Palette
Recipe: Paper. Images. Embellishments.
Paper: Crumb Cake, Call Me Clover, Garden Green, Real Red (8 1/2″ x 11″ & 12″ x 12″), Shaded Spruce & Whisper White card stock, All Is Bright DSP, Under the Mistletoe DSP & Wood Textures DSP & Silver Glimmer Paper.
Images: Winter Woods & Carols of Christmas Bundles, Wishing You Well stamp set, Starlight Thinlits, Seasonal Layers Thinlits, Large Letters Framelits & Swirly Snowflakes Thinlits & Real Red, Granny Apple Green, Early Espresso & Call Me Clover Stampin’ Pads.
Embellishments: Basic Jewels Pearls & Rhinestones, Red Rhinestones, Metallic Pearls, Festive Farmhouse Elements & Silver Mini Sequin Trim.
Extras: Softly Falling TIEF, Tin Tile Dynamic TIEF, 2 ½” Circle Punch, 1 ¼” Circle Punch, Stampin’ Trimmer, Stamparatus, Big Shot, Wink of Stella, Sponge Dauber, Frost White Shimmer Paint, Fine Tip Glue Pen, Glue Dots, Dimensionals and SNAIL, Daffodil Delight (dark) Stampin’ Blends
*Retired*
If you don’t have all the items for this project look at what you do have and make substitutions.
The Project:
Step 1:
Cut your pieces
- First Layer: Real Red card stock cut to 8 ½’ x 8 ½”.
- Second Layer: 2 ¾” x 2 ¾” – 4 Real Red, 2 Call Me Clover, 2 Shaded Spruce, 1 Crumb Cake.
- Third Layer: 2 ½” x 2 ½” – All Is Bright DSP: (1 of each) evergreens with red bells, evergreens with gold balls, poinsettia pattern, pinecone pattern. Under the Mistletoe: (1 each) deer on evergreens, real red with white pattern.
- Embossed Whisper White CS: 2 ½” x 2 ½” – emboss 2 with Softly Falling TIEF, emboss 1 with Tin Tile TIEF (apply a thin layer of shimmer paint over the surface with sponge dauber).
- Tip: I embossed a 6″ x 6″ piece of card stock. For the Softly Falling TIEF I cut the 2 ½” squares from the middle third so that I had heavier snow on the bottom and some lighter snow on the top.
- Tip: It’s a little tricky to cut after being embossed. Use your scoring blade to mark where to cut and then use scissors to cut out.
Step 2:
Stamp your images
- Pinecones: Stamp 4 in Early Espresso on Whisper White CS (Cut 4 with thintlits).
- Ornaments: Stamp 1 in Shaded Spruce on Whisper White CS (Cut with thinlits).
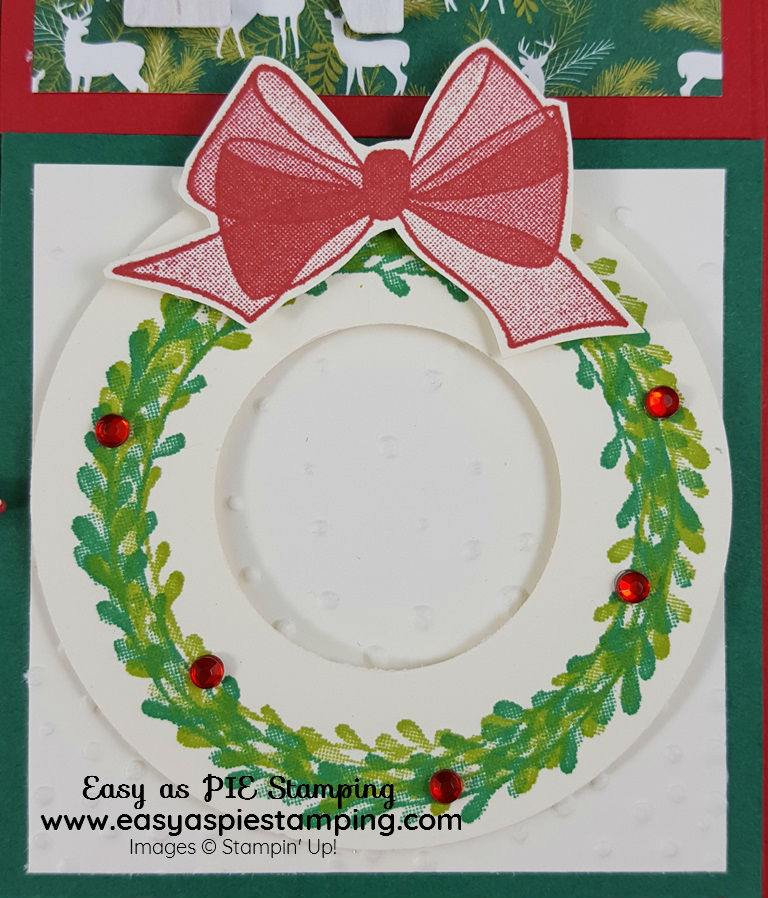
- Wreath: Stamp once in Call Me Clover then in Granny Apple Green slightly offset. Tip: I punched the 1 ¼” circle first then centered it in the 2 ½” circle punch and punched it out. Then I used the Stamparatus to stamp the wreath.
StampinUp 2018 Winter Sampler
- Bow: Stamp in Real Red then fussy cut. Apply the bow to the wreath with a dimensional then apply 5 red rhinestones to the wreath. To learn about what fussy cutting is and to see another project with fussy cutting see here.
Step 3:
Die cutting
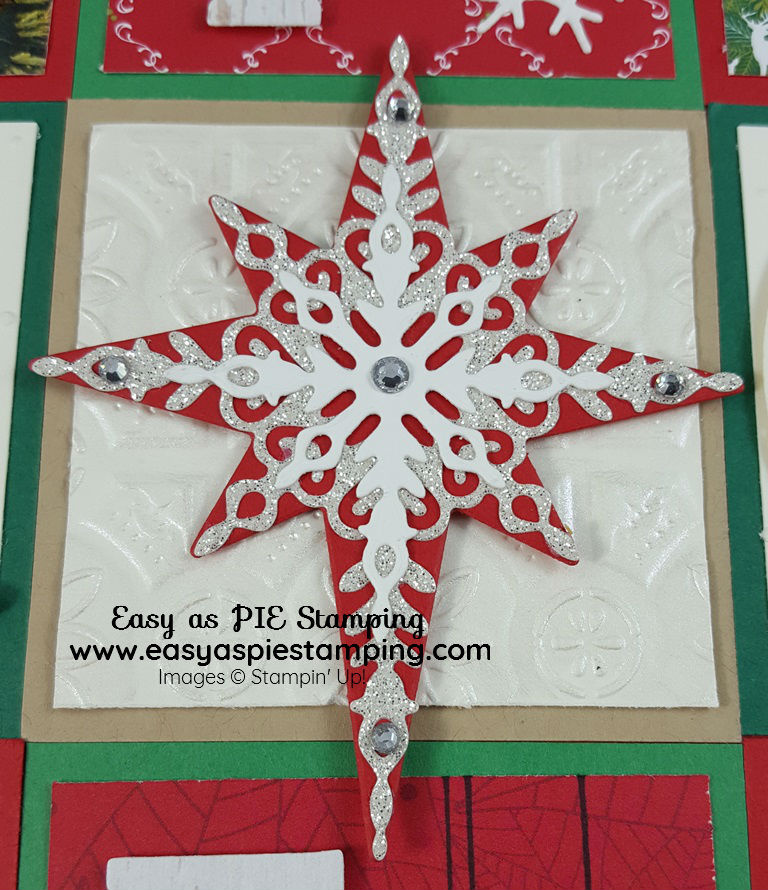
- Christmas Tree: Die cut larger tree in Garden Green, die cut the smaller tree in Whisper White. Wrap the sequins around the white tree like garland. Use a glue dot on the back to hold the sequins in place at the top of the tree and then at the bottom. Apply gold and silver pearls to the tree. Use a glue dot to adhere the star to the top of the tree (I colored it with a Daffodil Delight Blends (dark)). Apply the white tree to the green tree with dimensionals.

StampinUp 2018 Winter Sampler
- Star: Die cut the base in Real Red, use the larger intricate die with the silver glimmer paper; die cut the smaller intricate die in Whisper White. Use the fine tip glue pen to put the star together. Place a rhinestone in the center of the star and at the end of each of the longer points.
StampinUp 2018 Winter Sampler
- WINTER: Use Large Letters Dies to spell the word “WINTER” with a white washed Wood Textures DSP.
- Snowflakes: Die cut 1 large and 1 small snowflake in Whisper White CS then apply Wink of Stella.
- Swirl: Die cut 1 swirl in Whisper White card stock.
Step 4:
Putting it all together
- Use Snail to adhere the 2 ¾” x 2 ¾” pieces to the 8 ½” x 8 ½” real red card stock base (starting in the bottom left corner). Bottom row: Real Red, Call Me Clover, Real Red. Middle row: Shaded Spruce, Crumb Cake, Shaded Spruce. Top Row: Real Red, Call Me Clover, Real Red.
- Glue the DSP and embossed pieces using Snail according to the photograph.
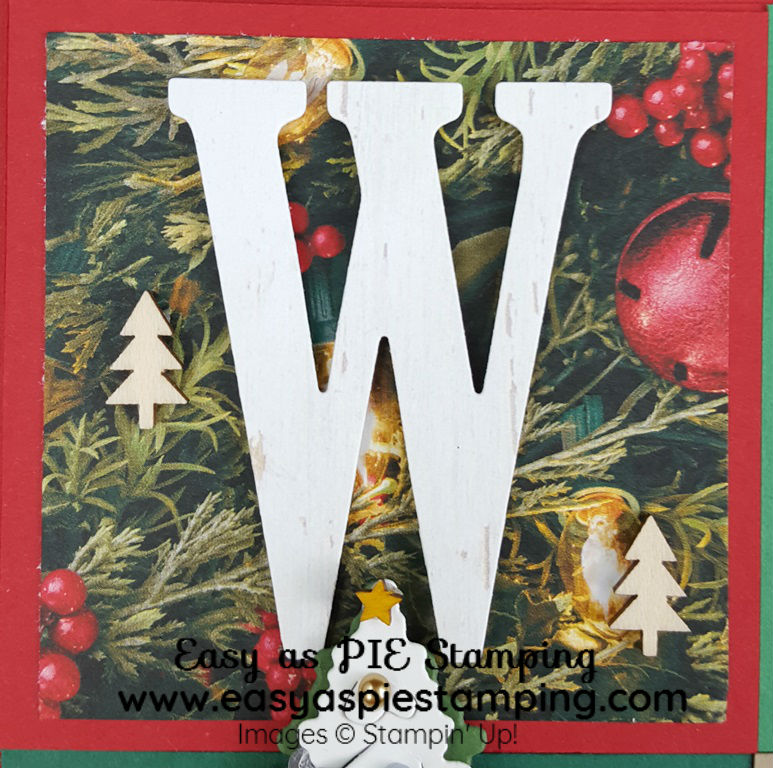
- W: Adhere the “W” with dimensionals and the trees with glue dots.
StampinUp 2018 Winter Sampler
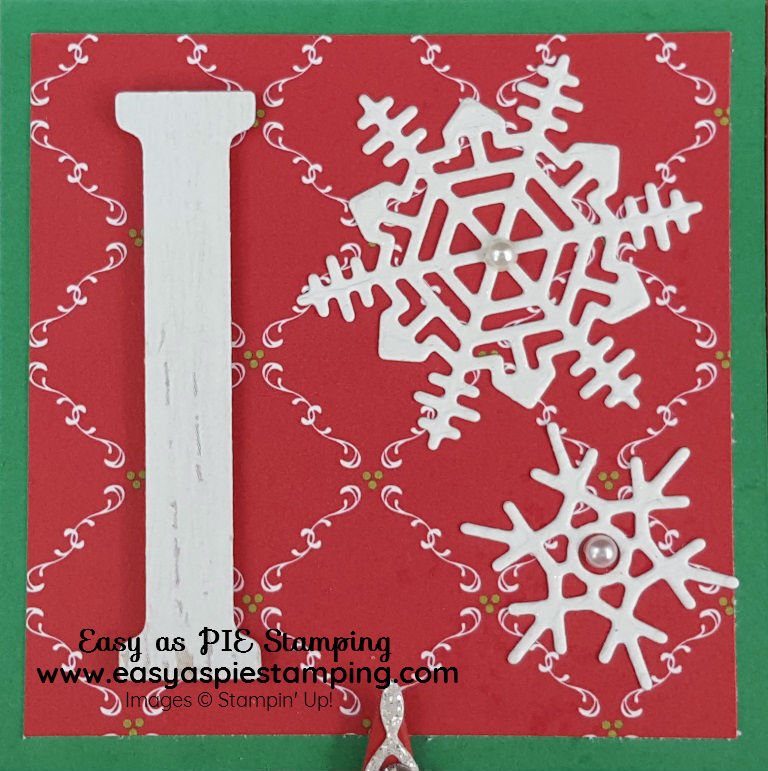
- I: Adhere the “I” with dimensionals and the snowflakes with fine tip glue pen. Apply a pearl to the center of each snowflake.
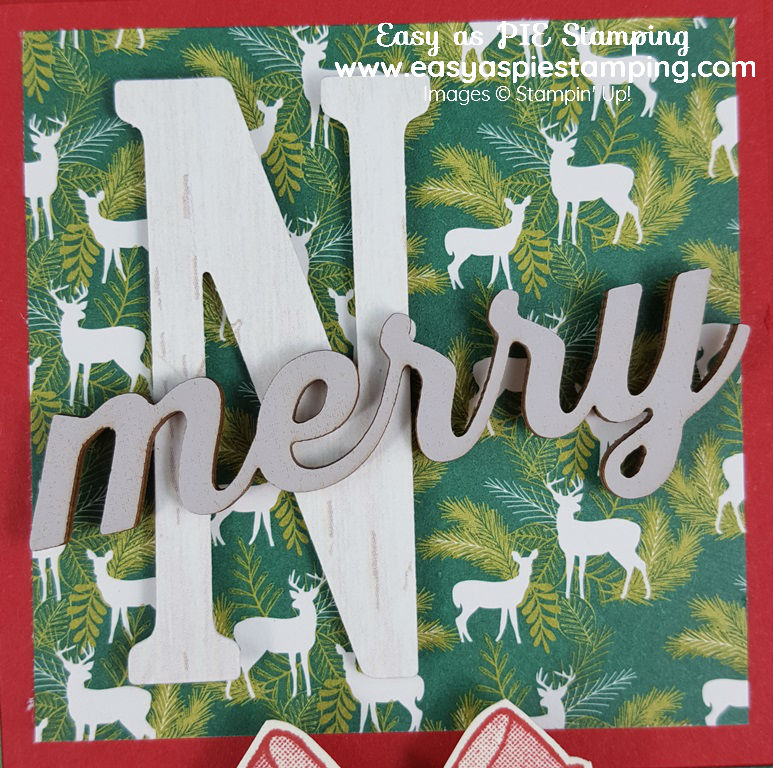
- N: Adhere the “N” with dimensionals and “merry” with mini dimensionals/glue dots. Tip: Where the word overlaps the “N” use a couple of glue dots.
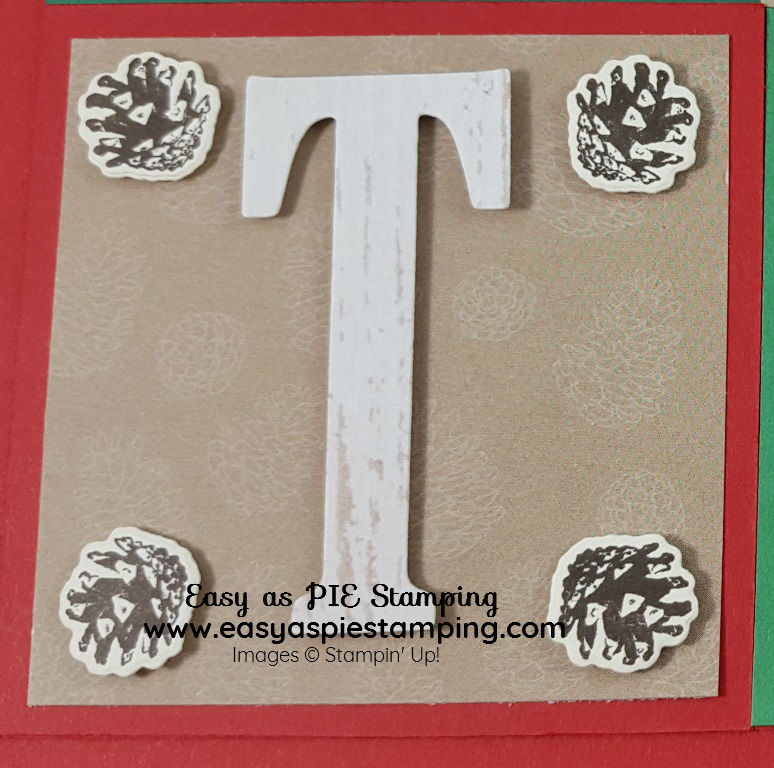
- T: Use dimensionals to adhere pinecones and the “T”.
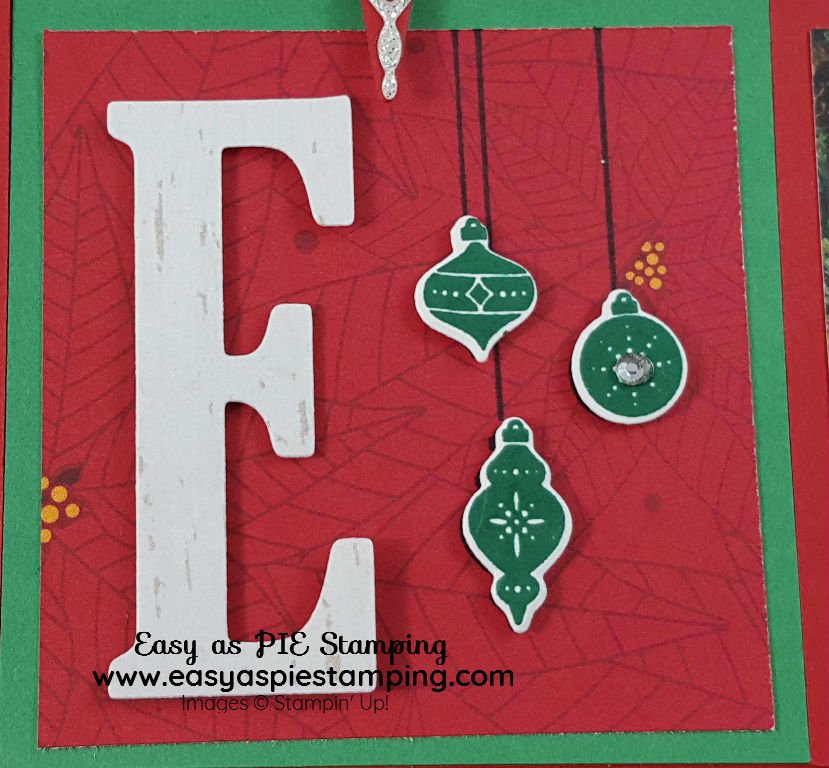
- E: First stamp the ornaments onto the DSP then use dimensionals to adhere the “E” and the ornaments. Apply a rhinestone to the center of one ornament.
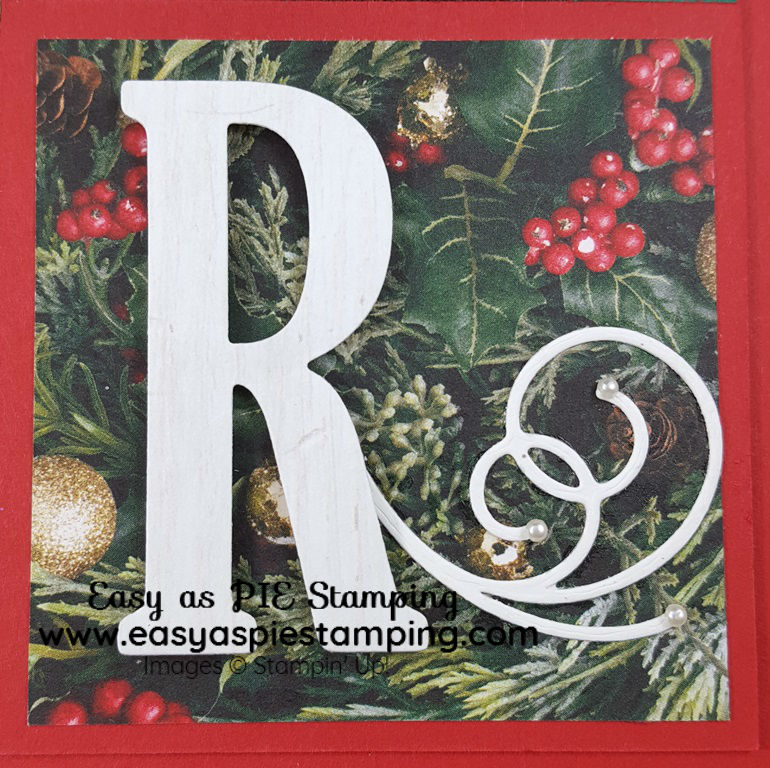
- R: Adhere the “R” with dimensionals then use the fine tip glue pen to adhere the swirl. Apply 3 pearls to the ends of the swirls.
StampinUp 2018 Winter Sampler
Step 5:
Placing in Frame
- Trim off the excess Real Red card stock that you mounted your project on.
- Mount the whole piece onto Real Red card stock cut to 9 1/8” x 9 1/8”.
- Place in the 9” x 9” Shadow Box Frame (mine is from IKEA).
StampinUp 2018 Winter Sampler
I hope you enjoyed this tutorial on how to create a StampinUp 2018 Winter Sampler.
Sign up for my weekly newsletter in the sign up box – top right (or at the bottom on mobile).
My project supply list
Click products to shop online!
 | ||
 | ||
 |  | |
 | ||
 |  | |
 | ||
 |  | |
 2-1/2″ Circle Punch [120906] $18.00 |


 Designer Series Paper")


Visit My SHOP!!
When placing an order in January use host code:
4BVDUUEP
Please join me every week as I share projects using Stampin’ UP! products.
We will have so much fun!
I would be honored to be your personal Stampin’ Up! Demonstrator!!
Happy Stamping,
Lois Avellanet
Creativity Coach


